As an Amazon Associate I earn from qualifying purchases.
Welcome, fellow adventurers! In the vast playground of outdoor activities, there’s one tool that stands out as a game-changer – binoculars. These compact wonders are not just for birdwatchers or stargazers; they’re your ticket to unlocking a whole new world around you.
Why are binoculars so crucial for your outdoor escapades?
Imagine being able to bring distant landscapes, birds, and celestial wonders closer to you with just a simple device. That’s the magic of binoculars. In this blog, we’re not just exploring lenses and focus wheels; we’re on a mission to make binoculars your best companion in the great outdoors.
Our Purpose
You may be asking yourself, “How exactly can binoculars enhance my outdoor experience?” at this point. That’s precisely what we’re here to unravel. This blog is your guide, your roadmap to becoming a pro at wielding binoculars. Whether you’re a novice eager to explore or a seasoned adventurer looking to optimize your viewing, we’ve got your back.
Join us on this journey as we delve into the basics, unravel the mysteries of adjusting those lenses, and share tips that will turn you into a binoculars maestro. Let’s embark on a visual adventure together, where every detail comes alive through the lenses of your trusty binoculars.
Ready to elevate your outdoor experience? Let’s dive in!
Understanding Binoculars
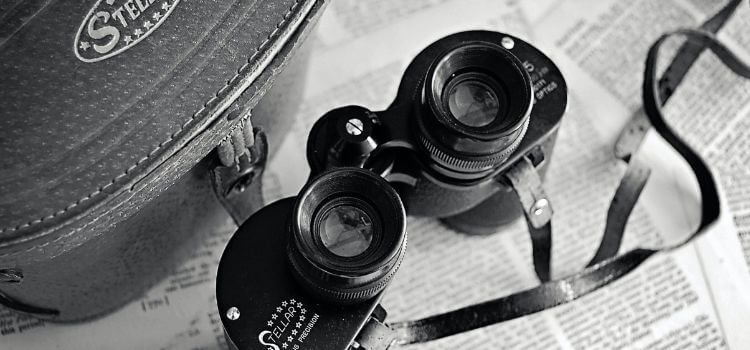
We embark on a journey to demystify the seemingly complex world of binoculars. If you’ve just picked up your first pair and are wondering what those fancy components do, fear not! We’ll break down the basics of binocular anatomy so that you can fully grasp the magic they hold.
1. Objective Lenses: The Eyes of Your Binoculars
– Think of the objective lenses as the eyes of your binoculars; they’re the big ones at the front. These lenses gather light and bring distant scenes into focus. The larger the objective lenses, the more light they can capture, making for brighter and clearer images. So, when shopping for binoculars, keep an eye out for those impressive front lenses – they’re key to a vivid viewing experience.
2. Eyepieces: Your Personal Viewing Portals
– The eyepieces are where the magic happens – they’re your personal viewing portals. These are the smaller lenses you peer into. Adjust them to match the distance between your eyes for a comfortable and immersive view. Higher quality eyepieces enhance your overall experience, so don’t underestimate their importance when choosing your perfect pair.
3. Focus Wheel: Bringing the World into Sharp Focus
– The focus wheel is your ticket to sharp, detailed views. Located at the center of your binoculars, this wheel lets you adjust the focus until your subject is crystal clear. It’s the key to transforming a fuzzy image into a breathtakingly sharp scene. Play around with it, and you’ll be amazed at the difference it makes.
4. Diopter Adjustment: Tailoring Binoculars to Your Unique Vision
– The diopter adjustment is like a personal touch for your binoculars. Found usually on one eyepiece, it lets you adjust the focus of each eye separately. This is especially crucial if your eyes have a slight prescription difference. Once set, you rarely need to adjust it, giving you a customized, hassle-free viewing experience every time.
And there you have it – a crash course in the basic components of binoculars. The next time you pick up your pair, remember that these lenses, eyepieces, focus wheel, and diopter adjustment are your allies in exploring the world up close.
Choosing the Right Binoculars
If you’re embarking on a journey to explore the world through binoculars, you’ve come to the right place. In this guide, we’ll delve into the diverse world of binoculars, helping you navigate through the maze of options to find the perfect pair for your specific activities.
A. Overview of Different Types and Sizes of Binoculars:
Binoculars come in all shapes and sizes, each designed for specific purposes. Here’s a quick breakdown:
1. Compact Binoculars:
– Ideal for travellers and hikers
– Lightweight and easy to carry
– Smaller magnification but suitable for general use
2. Full-Size Binoculars:
– Perfect for bird watching and stargazing
– Offers higher magnification and brighter images
– Usually more stable with a wider field of view
3. Zoom Binoculars:
– Versatile magnification options
– Suitable for various activities
– Compact, making them a popular choice for on-the-go adventurers
B. Considerations for Selecting the Right Binoculars for Specific Activities:
1. Bird Watching:
When choosing binoculars for bird watching, consider:
– Magnification: Opt for 8x to 10x for a closer look without sacrificing stability.
– Objective Lens Size: Larger lenses (around 42mm) allow more light, enhancing clarity.
– Field of View: A wide field of view is crucial for following birds in motion.
2. Stargazing:
If your passion lies in exploring the night sky, focus on:
– Magnification: Moderate magnification (7x to 10x) for a steady view of celestial objects.
– Objective Lens Size: Aim for larger lenses (50mm or more) to capture fainter stars.
– Exit Pupil: A larger exit pupil ensures brighter images in low-light conditions.
3. Sporting Events:
For those cheering on their favourite teams, consider:
– Magnification: 8x is the sweet spot, providing a balance between stability and detail.
– Field of View: A wider field of view helps capture fast-paced action.
– Durability: Look for waterproof and shockproof features for outdoor sports events.
Armed with this knowledge, you’re now equipped to choose the perfect binoculars for your adventures. Whether you’re capturing the vibrant plumage of a rare bird, exploring the cosmos, or cheering on your team from the stands, the right binoculars will enhance your experience and bring the world closer than ever before.
Adjusting Binoculars for Your Eyes
As you embark on your journey into the fascinating world of binoculars, it’s crucial to ensure that your viewing experience is nothing short of spectacular. One of the key elements in achieving this is mastering the art of adjusting binoculars for your eyes. In this segment, we’ll delve into the nitty-gritty details of adjusting the interpupillary distance and setting the diopter for individual eye focus, demystifying the process for beginners.
A. Proper Adjustment of the Interpupillary Distance:
Understanding and optimizing the interpupillary distance is the first step to unlocking the full potential of your binoculars. To get the ideal adjustment, just follow these easy steps:
1. Measure Your Interpupillary Distance (IPD):
Begin by holding the binoculars to your eyes in a natural and comfortable position. Adjust the distance between the two barrels until you have a clear, single merged image.
2. Mark Your IPD:
Once you’ve found the sweet spot, take note of the measurement. This distance is unique to each individual and ensures that both of your eyes are perfectly aligned with the binoculars.
3. Adjust the Binoculars:
Locate the interpupillary distance adjustment mechanism, usually a central hinge, and set it to match your recorded IPD. This simple step enhances comfort and ensures a seamless viewing experience.
B. Setting the Diopter for Individual Eye Focus:
The diopter adjustment is a game-changer when it comes to tailoring your binoculars to your eyes’ specific needs. Let’s break it down:
1. Understand the Diopter Adjustment:
The diopter is typically located on one of the eyepieces, often the right one. It allows you to compensate for the differences between your eyes’ vision.
2. Start with Both Eyes:
Cover the objective lens of the right barrel, focusing only on the left eye through the eyepiece. Adjust the main focus wheel until the image is crystal clear for your left eye.
3. Switch to the Other Eye:
Now, To sharpen the image for your right eye, cover the left objective lens and adjust the diopter on the right eyepiece. Keep the focus wheel untouched during this process.
4. Lock in Your Settings:
Once both eyes are individually focused, most binoculars have a locking mechanism to secure the diopter adjustment. This ensures that you only need to fine-tune the main focus wheel in the future.
By mastering the proper adjustment of interpupillary distance and the diopter, you’ve laid the foundation for a truly personalized and immersive binocular experience. Take your time to get these adjustments just right, and soon, you’ll find yourself effortlessly capturing the beauty of the world through your binocular lenses.
Basic Techniques for Using Binoculars
In this guide, we’ll delve into the essential techniques for using binoculars like a pro. Whether you’re an aspiring birder, stargazer, or sports fan, mastering these basic techniques will ensure a crisp and stable view through your binoculars.
Section I: Holding Binoculars Correctly for Stability
Ever wondered why your binoculars shake or feel uncomfortable after prolonged use? The key lies in holding them correctly. Follow these simple tips to achieve stability and reduce those shaky moments:
1. Proper Grip: Hold your binoculars with both hands, keeping your thumbs and fingers wrapped around the barrels for a secure grip.
2. Elbow Support: Rest your elbows against your body or another stable surface to minimize hand tremors and enhance steadiness.
3. Adjust the Interpupillary Distance: Set the binoculars to match the distance between your eyes, ensuring a comfortable and stable view.
Section II: Adjusting the Focus to Sharpen the Image
Getting a clear and sharp image through your binoculars involves mastering the focus. Here’s how to make those distant objects come into crystal-clear view:
1. Start with One Eye: Close one eye and use the center focus wheel to sharpen the image in the other eye.
2. Fine-Tune Diopter Settings: To account for variations in vision between your eyes, adjust the diopter on one of the eyepieces.
3. Focus on a Distant Object: Aim at a distant object and slowly turn the center focus wheel until the image becomes sharp and detailed.
Section III: Tips for Maintaining a Steady View
A steady view is crucial for capturing the details of your subject. Use these pointers to guarantee a seamless and entertaining watching experience:
1. Use a Tripod: For extended viewing sessions, consider using a tripod to eliminate hand fatigue and maintain a rock-steady view.
2. Breathe and Relax: Breathe deeply, then gently release the air before concentrating. Your body becomes more stable and less shaky when you relax.
3. Choose the Right Binoculars: Opt for binoculars with image stabilization technology for an extra layer of steadiness, especially in shaky conditions.
Congratulations! You’ve now unlocked the basics of using binoculars like a seasoned explorer. By mastering these simple techniques, you’ll elevate your viewing experience and open new doors to the wonders of the world.
Common Binocular Mistakes Beginners Must Avoid
If you’ve recently embarked on your journey with binoculars, you’re in for a treat. However, to ensure a crystal-clear view of the world around you, let’s dive into some common mistakes that beginners often make and how to steer clear of them.
1. Neglecting Proper Cleaning and Maintenance
Binoculars are your window to the great outdoors, and like any window, they need a little TLC. One common pitfall is overlooking the importance of proper cleaning and maintenance. Dust, smudges, and the wear and tear of outdoor adventures can impact the clarity of your lenses.
Tip: Invest in a lens cleaning kit and make it a habit to clean your binoculars before and after each use. A gentle brush for removing debris and a microfiber cloth for smudges work wonders. Keep your gear in top-notch condition for a consistently sharp view.
2. Ignoring Eye Relief Adjustments
Ever felt eye strain or discomfort while using binoculars? It might be due to neglecting the eye relief adjustments. The ideal distance between your eyes and the eyepiece is known as eye relief, and it guarantees a comfortable viewing experience.
Tip: Before you embark on your nature exploration, take a moment to adjust the eyecups to match your eye relief needs. Whether you wear glasses or not, finding the right setting ensures a relaxed viewing session without compromising on image quality.
3. Using Binoculars with the Wrong Interpupillary Distance
Interpupillary what now? Fear not, and it’s simpler than it sounds. The interpupillary distance refers to the space between your eyes, and setting it correctly is crucial for a merged and focused image.
Tip: Grab your binoculars and hold them up to your eyes. Adjust the distance between the eyepieces until you see a single, circular field of view. This not only enhances the 3D effect but also prevents eye strain.
By avoiding these common blunders, you’ll maximize the potential of your binoculars and elevate your outdoor experiences. Remember, a little care goes a long way in ensuring your lens becomes a clear portal to the wonders of nature. Happy bird watching, stargazing, or whatever adventure lies ahead!
Practical Tips for Beginners
Welcome to the world of binoculars! If you’ve just acquired your first pair, congratulations! To help you make the most of your new gear, here are some practical tips tailored for beginners.
Section I: Practice in Various Settings
Getting accustomed to your binoculars is key. Don’t just limit yourself to your backyard – take them everywhere! Here’s why:
A. Explore Different Environments:
– Venture into your local park, nature reserves, or even your own neighbourhood.
– Practice adjusting the focus based on varying distances.
– Get comfortable with holding them steadily for extended periods.
Section II: Hands-on Experience with Local Groups
Learning is more fun when shared. Consider joining local bird-watching or astronomy groups to enhance your skills.
B. Joining Local Enthusiast Groups:
– Make connections with others who share your interest.
– Attend group outings for practical, hands-on experience.
– Learn from experienced members about spotting techniques and valuable insights.
Section III: Tap into Online Resources
In the digital age, the internet is a treasure trove of knowledge. Leverage online resources to boost your understanding of binoculars.
C. Exploring Online Tutorials:
– Seek out reputable websites offering tutorials for beginners.
– Watch video guides to visually grasp adjustments and usage.
– Ask questions and share experiences with the online community by participating in forums.
Incorporating these practical tips into your binocular journey will fast-track your learning process. Remember, mastery comes with time and experience. So, grab your binoculars, step outside, and let the exploration begin!
Conclusion
In a nutshell, for all you beginners out there venturing into the exciting world of binoculars, let’s do a quick rewind and highlight the key takeaways.
A. Understanding Your Gear: Get acquainted with the basic parts – lenses, eyepieces, focus wheel, and diopter adjustment. Knowing your binoculars is like having the map for a treasure hunt!
B. Choosing Wisely: Select the right pair based on your interests. Whether it’s bird watching, stargazing, or catching a game, there’s a set of binoculars designed just for you.
C. Adjustment is Key: Set up your binoculars like a pro – interpupillary distance, diopter, the whole shebang. It’s like finding the perfect settings for your favourite game – tailor-made for your eyes.
D. Hold Steady: Keep those binoculars stable. No one likes a shaky view! Remember, it’s all about clarity.
E. Practice Makes Perfect: Don’t shy away from practising. It’s the secret sauce to becoming a binocular maestro. The more you use them, the more of a pro you’ll become.
As we wrap up, here’s a big high-five for taking the plunge into the wonderful world of binoculars! Embrace the learning curve, enjoy the discoveries, and let the benefits of sharper, closer views unfold before your eyes.
So, fellow adventurers, gear up, step outside, and let your binoculars be your companions on this thrilling journey of exploration. Happy bird watching, star gazing, and game spotting! Cheers to the world through your binocular lens!
Related Guide
5 Best Binoculars Under 50 in 2024
Amazon and the Amazon logo are trademarks of Amazon.com, Inc, or its affiliates.
Leave a Reply