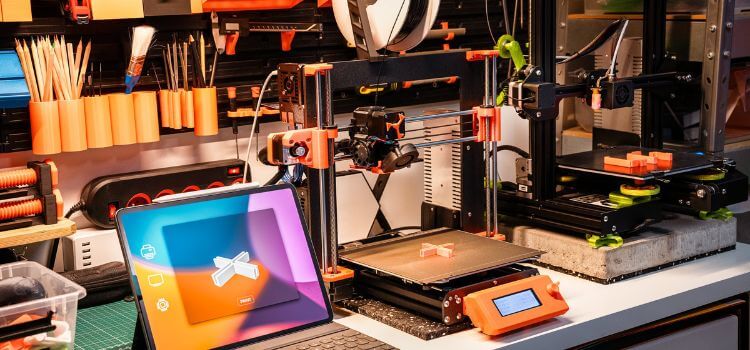
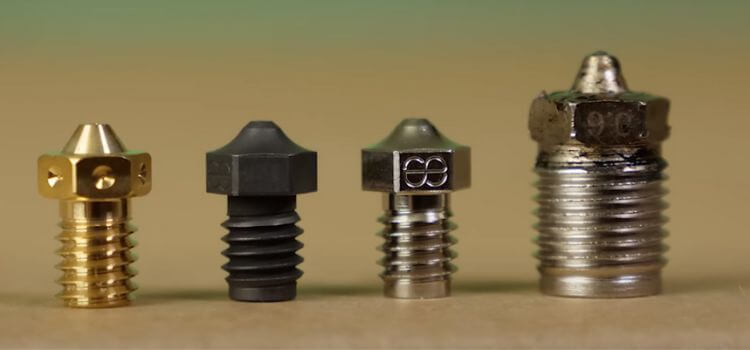
Welcome back, fellow 3D printing enthusiasts! Today, we’re diving into a crucial aspect of maintaining your beloved 3D printer – the often-overlooked nozzle. As any seasoned maker will tell you, a clean nozzle is the secret sauce behind jaw-dropping print quality. So, let’s unravel the mysteries of nozzle maintenance in a language that only a beginner can understand.
A. The Lowdown on Nozzle TLC:
Picture this: your 3D printer’s nozzle is like the artist’s brush, shaping your creations layer by layer. To keep that magic flowing, regular nozzle maintenance is a must. It’s not just about aesthetics; it’s about ensuring your prints come out looking as flawless as you envisioned.
B. How Nozzle Cleanliness Affects Your Prints:
Now, let’s get into the nitty-gritty. A dirty nozzle equals a print-quality rollercoaster. Think uneven layers, blobs, and a general lack of finesse. Your prints might resemble abstract art, but we’re aiming for precision here! Clean nozzles ensure a smooth extrusion flow, resulting in cleaner lines, sharper details, and a masterpiece you’ll be proud to showcase.
C. Why Regular Maintenance is Your Print’s Best Friend:
Imagine this scenario: you’re halfway through an intricate print, and suddenly, disaster strikes – a clogged nozzle. Regular maintenance acts as your 3D printer’s shield against such nightmares. By dedicating a little time to keep things spick and span, you prevent clogs and defects, ensuring your printer operates at its prime, print after flawless print.
So, buckle up as we embark on this journey of nozzle enlightenment. It’s time to unleash the full potential of your 3D printer and take your creations to new heights!
Signs of a Clogged Nozzle
As 3D printing enthusiasts, we know the thrill of watching our creations come to life layer by layer. However, there’s nothing more frustrating than running into print problems, especially when it’s due to a clogged nozzle. In this guide, we’ll dive into the common red flags that scream “clogged nozzle alert” and how to tackle them like a pro.
Section I: The Telltale Signs
Subtitle: “Irregular Extrusion”
Picture this: your 3D printer starts spitting out filament in a way that Picasso might appreciate, but not your print. If you’re noticing uneven lines or gaps in your model, it’s a sign of irregular extrusion – a classic symptom of a clogged nozzle.
Subtitle: “Layer Adhesion Issues”
Is your once-sturdy print turning into a leaning tower of Pisa? Layer adhesion problems, where the layers aren’t bonding properly, often indicate a nozzle on the fritz. We’ve all been there – you had dreams of a robust structure, but it’s starting to resemble a Jenga tower. Fear not, we’ve got solutions.
Subtitle: “Stringing or Oozing”
Imagine your 3D print playing Spider-Man and leaving behind a trail of string-like webs. Stringing or oozing occurs when excess filament trails between different parts of your print. While it might look like your creation is having a “spidey moment,” it’s actually a sign of a clogged nozzle misbehaving.
Section II: Solutions Made Simple
Subtitle: “Hot and Cold Pull Methods”
No need to break a sweat – the hot and cold pull methods are your trusty sidekicks in battling nozzle clogs. We’ll walk you through these techniques step by step, making it as easy as enjoying your morning coffee.
Subtitle: “Using Needle or Nozzle Cleaning Kit”
Enter the superhero tools – the needle and cleaning kit. Unleash their power to restore your nozzle to its prime. Our guide will help you navigate this process smoothly, even if you’re new to the world of 3D printing maintenance.
Subtitle: “Soaking the Nozzle in Isopropyl Alcohol”
Sometimes your nozzle needs a spa day. Discover the magic of soaking your nozzle in isopropyl alcohol, a refreshing treatment to dissolve stubborn clogs. We’ll guide you through the soak, ensuring your nozzle emerges squeaky clean.
In the 3D printing universe, a clogged nozzle is just a minor hiccup. By recognizing these signs early on and arming yourself with our simple solutions, you’ll be back to printing flawless creations in no time. Stay tuned for more tips and tricks from your favourite 3D printing blog – because every masterpiece deserves a smooth journey from the filament to the finished product!
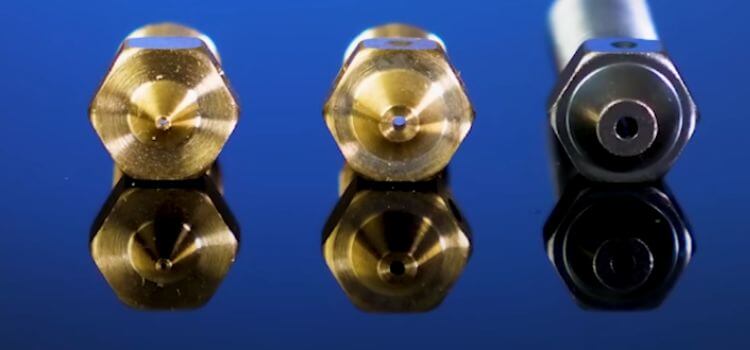
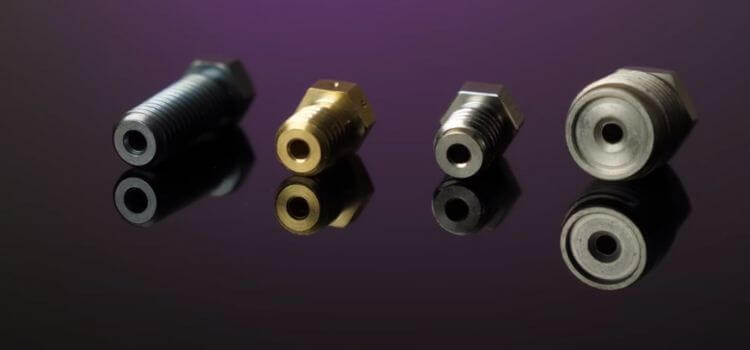
Tools and Materials Needed
When it comes to unleashing the full potential of your 3D printer, maintaining a clean nozzle is paramount. A clogged nozzle can be the culprit behind irregular prints and frustrating defects. Fear not, for I, your friendly neighbourhood blog guru, am here to guide you through the essential tools and materials you’ll need to keep that nozzle in tip-top shape.
The Bare Necessities: Your Cleaning Arsenal
1. Needle or Nozzle Cleaning Kit: Picture this as your superhero cape for combating nozzle clogs. A handy needle or a specialized cleaning kit will be your trusty sidekick in the battle against filament residue.
2. Tweezers: Think of tweezers as your precision weapon in the war against tiny, stubborn gunk. These little wonders help you delicately pluck away any remnants causing trouble.
3. Isopropyl Alcohol: Meet your cleaning elixir. Isopropyl alcohol is the magic potion that dissolves filament residue and leaves your nozzle sparkling. Keep it on standby for a pristine print every time.
4. Microfiber Cloth: The finishing touch to your cleaning masterpiece. A gentle wipe-down with a microfiber cloth ensures no residue is left behind, guaranteeing a clean slate for your next creative venture.
Setting the Stage: Preparing Your 3D Printer for Nozzle TLC
Before you dive into the cleaning process, ensure your 3D printer is in safe mode. Power it down, unplug it, and let the nozzle cool down. Safety first, my friends!
Mastering the Art: Cleaning Techniques Demystified
– Hot and Cold Pull Methods: Imagine yoga for your 3D printer. Follow the steps for a hot pull or cold pull to keep that nozzle flexible and free.
– Needle or Nozzle Cleaning Kit Magic: Learn the delicate dance of inserting and manoeuvring the needle or cleaning kit for optimal results.
– Soaking the Nozzle in Isopropyl Alcohol: Give your nozzle a spa day. Let it soak in isopropyl alcohol for the recommended duration, and watch the residues melt away.
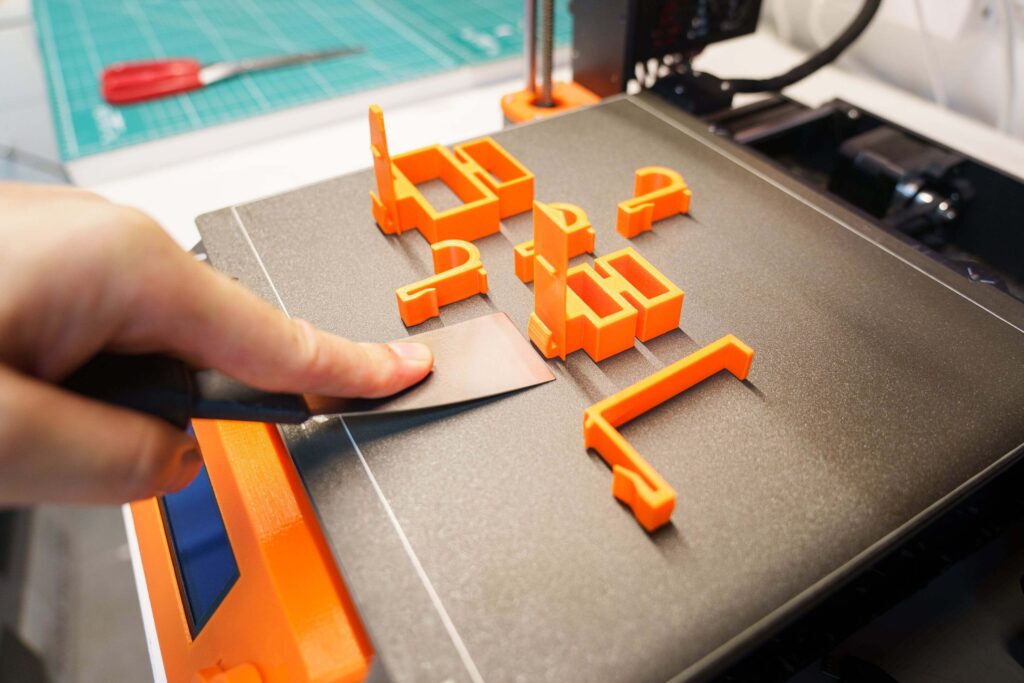
– Cleaning the Surrounding Area: Don’t forget the dance floor! Tend to your build plate, ensuring it’s pristine and ready for the next big performance.
The Rebirth: Reassembling Your 3D Printer
Once the cleaning spectacle is complete, it’s time to bring your 3D printer back to life. Carefully insert the freshly cleaned nozzle and load your filament like a maestro gearing up for a grand symphony.
Staying Ahead: Preventative Measures for Nozzle Nirvana
– Regular Maintenance Schedule: Mark it on your calendar. Consistent maintenance is the key to nozzle longevity and optimal performance.
– Filament Quality and Storage Tips: Keep your filament happy, and it’ll reciprocate. Store it properly and ensure it’s of high quality for seamless printing.
– Embrace the Filament Filter: Think of it as your printer’s immune system. A filament filter can catch those pesky impurities, ensuring a smooth journey through the nozzle.
Navigating the Maze: Troubleshooting Tips
Even superheroes need backup. If your nozzle issues persist, fear not to seek professional help. There’s a whole community of experts ready to swoop in and save the day.
As we wrap up this nozzle-cleaning odyssey, remember: a clean nozzle is the gateway to 3D printing brilliance.
Preparing the 3D Printer for Nozzle Cleaning
Let’s dive into a crucial aspect of maintaining your 3D printer – cleaning the nozzle. Ensuring your nozzle is in top-notch condition is key to achieving flawless prints. In this segment, we’ll focus on the vital steps to safely prepare your 3D printer for nozzle cleaning.
I. Safety Precautions
A. Turn Off and Unplug
1. The first rule of any maintenance task: is safety first. Power down your 3D printer and unplug it from the electrical source.
2. This simple step ensures a risk-free environment, protecting you and your equipment during the cleaning process.
B. Allow the Nozzle to Cool Down
1. Give your printer a breather. Allow the nozzle to cool down before attempting any cleaning. This prevents accidental burns and promotes an efficient cleaning process.
II. Removal of Filament
A. Retracting Filament Properly
1. Next up, let’s clear the way. Safely remove any filament present in the nozzle by retracting it properly.
2. Follow your printer’s manual for guidance on filament retraction. This step ensures a smooth nozzle cleaning experience without any filament interference.
By taking these simple yet crucial steps to prepare your 3D printer for nozzle cleaning, you’re setting the stage for optimal performance and exceptional print quality. Remember, a little care goes a long way in the world of 3D printing. Stay tuned for more pro tips on keeping your 3D printer in top shape!
Cleaning: A Step-by-Step Guide
In the world of 3D printing, achieving flawless prints is an art. One crucial aspect often overlooked is keeping your 3D printer nozzle clean. Let’s dive into some easy yet effective cleaning techniques to ensure your prints come out perfect every time.
I. Hot and Cold Pull Methods:
A. Hot Pull:
1. Start by heating your 3D printer nozzle to its normal printing temperature.
2. Carefully feed a small piece of filament into the heated nozzle.
3. Allow the filament to melt and then swiftly pull it out.
4. Repeat until you see a clean and smooth filament extraction.
B. Cold Pull:
1. Begin by cooling down the nozzle to room temperature.
2. Cut a small length of filament and insert it into the cooled nozzle.
3. As the filament solidifies, gently pull it out, bringing any debris with it.
4. Repeat until the pulled filament comes out clean.
II. Using Needle or Nozzle Cleaning Kit:
A. Proper Insertion and Movement:
1. Turn off the 3D printer and let the nozzle cool down.
2. Carefully insert the cleaning needle or use the provided cleaning kit.
3. Gently move the needle in a circular motion to dislodge any stuck debris.
4. Carefully remove the needle, ensuring not damage the nozzle.
III. Soaking the Nozzle in Isopropyl Alcohol:
A. Duration and Precautions:
1. Detach the nozzle and place it in a container with isopropyl alcohol.
2. Let it soak for 1-2 hours to dissolve any stubborn residues.
3. Use a soft brush or toothbrush to gently scrub the nozzle.
4. Rinse thoroughly with clean water and ensure it’s completely dry before reattaching.
IV. Cleaning the Surrounding Area:
A. Removing Residue on the Build Plate:
1. Turn off and unplug your 3D printer.
2. Wipe the build plate with a microfiber cloth dampened with isopropyl alcohol.
3. Ensure there is no residue or leftover filament on the build plate.
4. Regularly clean the build plate to prevent adhesion issues.
A well-maintained 3D printer nozzle is the key to achieving top-notch prints. By following these straightforward cleaning techniques, you’ll not only enhance your print quality but also extend the life of your 3D printer. Remember, a clean nozzle is a happy nozzle!
Nozzle Cleaning and Filament Loading Guide
In the journey of perfecting our craft, it’s crucial to dive into the nitty-gritty of reassembling our 3D printers after a thorough nozzle cleaning. In this segment, we’ll walk through the simple yet essential steps of properly inserting the cleaned nozzle and loading filament with precision.
A. Properly Inserting the Cleaned Nozzle:
After a successful cleaning mission, the next step is ensuring the proper reintegration of the nozzle into its habitat. Here’s a straightforward guide:
1. Cool Down and Power Off: Before anything, make sure your 3D printer is powered down and the nozzle has cooled to a safe temperature. Safety first, always!
2. Gentle Removal: If you detached the nozzle during the cleaning process, gently attach it back, ensuring not to overtighten. Finger-tight is the magic touch here.
3. Alignment Check: Verify that the nozzle is perfectly aligned with the heater block. Misalignment can lead to printing woes, and we’re all about perfection!
4. Tighten with Care: Once aligned, snugly tighten the nozzle using a wrench. Again, no need to go Hulk – a firm but gentle touch is key.
B. Loading Filament Correctly:
Now that our nozzle is back in place, let’s feed it the lifeblood – filament. Here’s how to load filament like a pro:
1. Preheat the Nozzle: Power up your 3D printer and initiate the preheating process. This ensures that the filament flows smoothly through the nozzle.
2. Feed the Filament: With the nozzle heated, gently insert the filament into the extruder, ensuring it’s well-guided into the hotend. Keep a close eye for any resistance.
3. Extrude a Bit: Once the filament is in, use your printer’s interface to extrude a small amount. This confirms that the filament is flowing freely and eliminates any air gaps.
4. Fine-Tune as Needed: If there are any hiccups, don’t panic! Fine-tune the process by adjusting the tension on the extruder and rechecking the filament path.
There you have it – the art of reassembling your 3D printer post-nozzle cleaning. Following these simple steps ensures that your printer is geared up for flawless creations. Remember, the devil is in the details, and these small yet vital steps contribute to the perfection of your 3D prints.
Essential Preventative Measures
Today, we’re delving into the proactive side of 3D printing – ensuring a glitch-free experience by adopting some key preventative measures. Let’s dive in and keep those nozzles clean for top-notch prints!
I. Regular Maintenance Schedule:
a. Why Regular Maintenance Matters:
– Brief explanation of how neglecting maintenance can lead to nozzle clogs and print defects.
b. Creating a Routine:
– Emphasize the importance of a consistent maintenance schedule.
– Simple steps to follow, like weekly nozzle checks and monthly deep cleanings.
– Highlight the time investment as a small price for high-quality prints.
II. Filament Quality and Storage Tips:
a. Choosing Quality Filament:
– Insight into how filament quality impacts print results.
– Quick tips on selecting reliable filaments from reputable brands.
b. Proper Filament Storage:
– Stress the significance of keeping filament dry and dust-free.
– Suggestions for airtight containers or desiccant packs.
– A reminder that good filament equals smoother printing.
III. Importance of Using a Filament Filter:
a. Why Filtration Matters:
– Explain how contaminants can affect nozzle performance.
– Introduction to filament filters as a solution.
b. Easy Integration:
– Highlight the user-friendly nature of filament filters.
– Quick steps on attaching filters to your setup.
c. Extended Nozzle Life:
– Touch on the longevity benefits of using a filament filter.
– Emphasize cost-effectiveness in the long run.
There you have it, makers – the trifecta of preventative measures to keep your 3D printing game strong! Regular maintenance, quality filament, and a trusty filament filter are your allies in the quest for flawless prints. Implement these simple steps, and you’ll be crafting masterpieces with ease.
Troubleshooting Tips for Your 3D Printer Nozzle
In the fascinating world of additive manufacturing, the key to top-notch prints lies in maintaining a squeaky-clean 3D printer nozzle. In this blog post, we’ll dive into troubleshooting tips for those stubborn nozzle issues that can throw a wrench into your creative process. Let’s get those printers back on track!
I. Addressing Persistent Nozzle Issues
A. Inspecting for Residue Buildup
1. Simple English Tip: Regularly check your nozzle for any gunk or buildup.
B. Hot and Cold Pull Techniques
1. Simple English Tip: Give your printer a spa day with hot and cold pulls to clear out any stubborn gunk.
C. Needle or Nozzle Cleaning Kit
1. Simple English Tip: Think of it like dental care for your 3D printer – a gentle clean with the right tools goes a long way.
D. Soaking in Isopropyl Alcohol
1. Simple English Tip: Let your nozzle take a bath in alcohol for a bit – it works wonders!
II. Seeking Professional Help if Needed
A. When DIY Isn’t Enough
1. Simple English Tip: If all else fails, don’t hesitate to reach out to the pros.
B. Connecting with Support Services
1. Simple English Tip: Your printer deserves the best care, and sometimes, it’s okay to call in the experts.
In the grand scheme of 3D printing adventures, nozzle issues are just bumps in the road. Armed with these troubleshooting tips, you’re now equipped to tackle any nozzle-related challenges head-on. Remember, a little TLC for your nozzle goes a long way in ensuring your creations are nothing short of spectacular.
Conclusion
Alright, my fellow 3D printing enthusiasts, let’s wrap up our journey into the world of nozzle cleanliness. In this blog, we’ve delved into the crucial role a clean nozzle plays in the quality of your prints. Remember, it’s not just about preventing clogs; it’s about elevating your 3D printing game.
Recap:
So, why is a clean nozzle so vital? It’s the unsung hero behind every detailed layer and precise print. From preventing irregular extrusion to saying goodbye to those pesky stringing issues, a clean nozzle is the key to achieving flawless prints.
Encouragement for Regular Maintenance:
Now, here comes the pep talk. Regular nozzle maintenance is the secret sauce to keep your prints top-notch. Make it a habit, like brushing your teeth or checking your phone in the morning. Trust me, your 3D printer will thank you with impeccable creations.
Closing Thoughts:
As we bid adieu, let’s reflect on the bigger picture – a well-maintained 3D printer is not just a machine; it’s a creator of possibilities. It’s the tool that brings your ideas to life layer by layer. Treat it well, clean its nozzle regularly, and witness the magic unfold every time you hit ‘print.’
In the grand tapestry of 3D printing, the nozzle is your artistic brush, and a clean one at that ensures your masterpiece is nothing short of perfection. So, my friends, go ahead, embrace the regular maintenance routine, and let your creativity soar with a 3D printer that’s always in its prime.